
In my previous post, I talked of how hiking Torre del Paine had been one of my dreams for a long time and it really didn’t disappoint me once I got to actually visit the place. While for various reasons, many people travelling through South America for longer period of times skip it, I think it’s really worth visiting.
If you are planning a visit there, I hope this post will be useful for you if you are looking for information on distances between the main refugios/campsites and viewpoints.
In my previous post, I also talked about the topics below, so if you are interested in any of these, click here:
- Getting there
- Getting started – where to find information and rent gear
- Transport to the park
- National Park Fee
- Accommodation, Refugios and Campsites
- When is the best time to go
Distances and difficulty levels
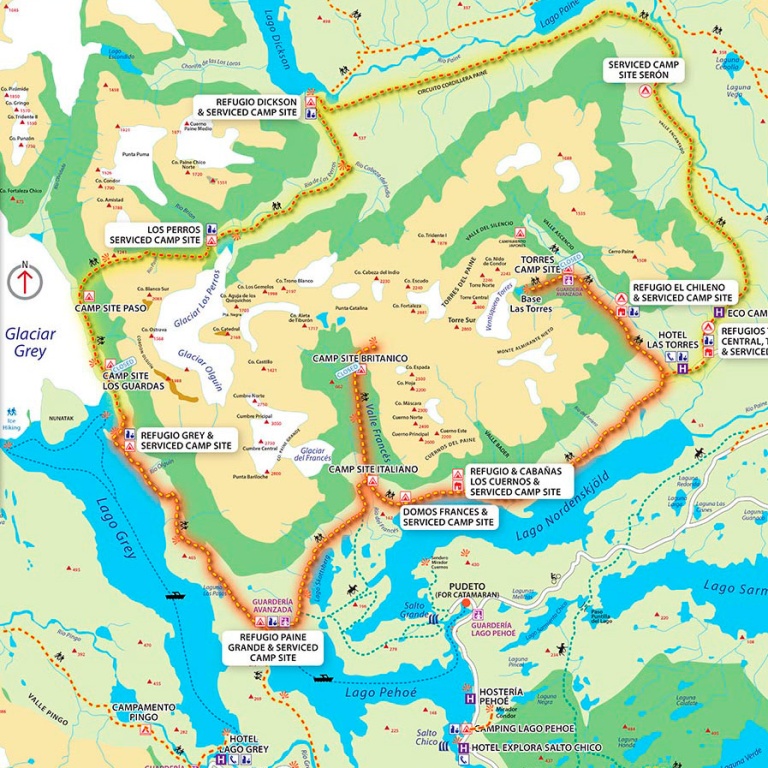
W Trek Map by experiencechile.org
If you are doing the W Trek, the most popular route to take is to hike West to East starting from Refugio Paine Grande. This is the best option for two reasons. First, the Base de las Torres trail is the most challenging part of the hike and by hiking West to East you’d be leaving this part for last, meaning that you would have less food with you, making your bag a little bit lighter. The second reason is that apparently the incredibly strong winds on the trail makes it even harder to hike in the opposite direction.
I explained how to get to Paine Grande here, and once you are there, these are the main distances and difficulty levels:
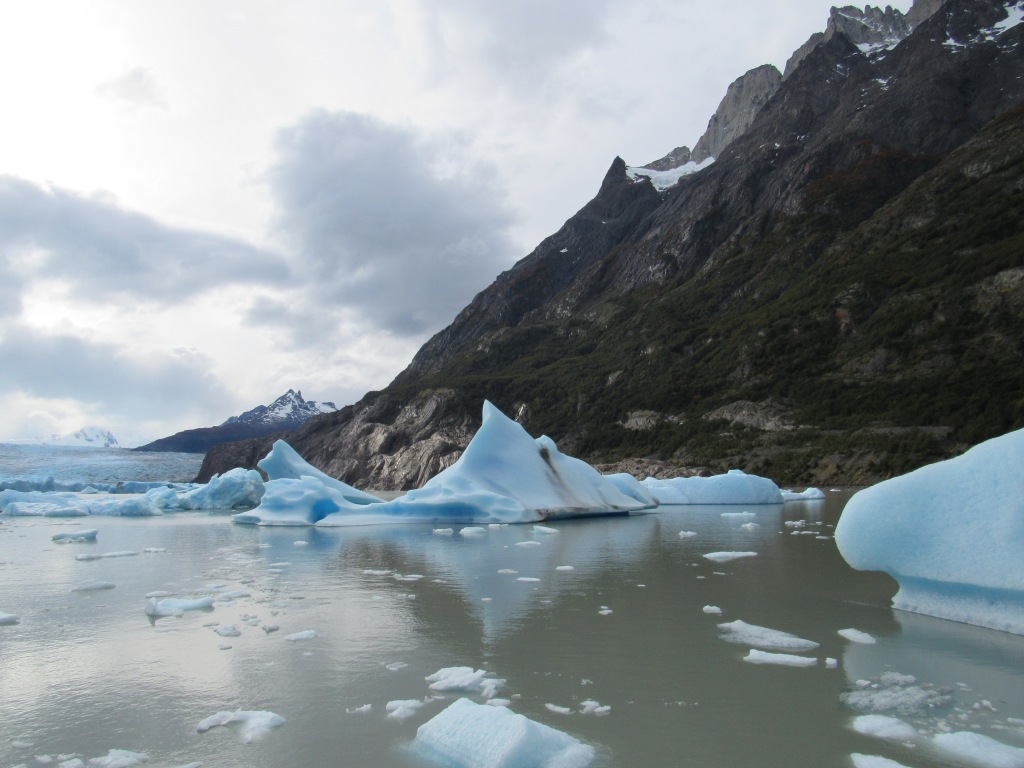
📌Paine Grande to Glacier Grey
Distance: 13 km (one way) | Difficulty: moderate
From Paine Grande to the Grey Refugio and Camping is 11 km, but keep in mind that from the Refugio to the actual Glacier it’s another 2km. This trail isn’t too hard, with a mix of uphill and downhill. We walked there and back and, including two food breaks, it took us 8 hours in total.
📸Highlights of this trail: This was my favourite section of the W Trek. Along the way, you can constantly see the beautiful Lake Grey, full of floating icebergs, as well as other pretty spots, like the Laguna de los Patos. At the end you will see Glacier Grey, the highlight of the whole trek for me.
📌Paine Grande to Campamento Italiano
Distance: 7.6 km| Difficulty: easy
The distance from Paine Grande to Campamento Italiano, the start of the middle section of the “W” is 7.5km. However, the trail is mostly flat, although with some very muddy parts, and so it only took us 2 hours to get there.
📸Highlights of this trail: Being mostly flat, in this section, you won’t be able to see the same magnificent views as in other parts of the W Trek, but this part is still nice, full of trees, plants and birds.

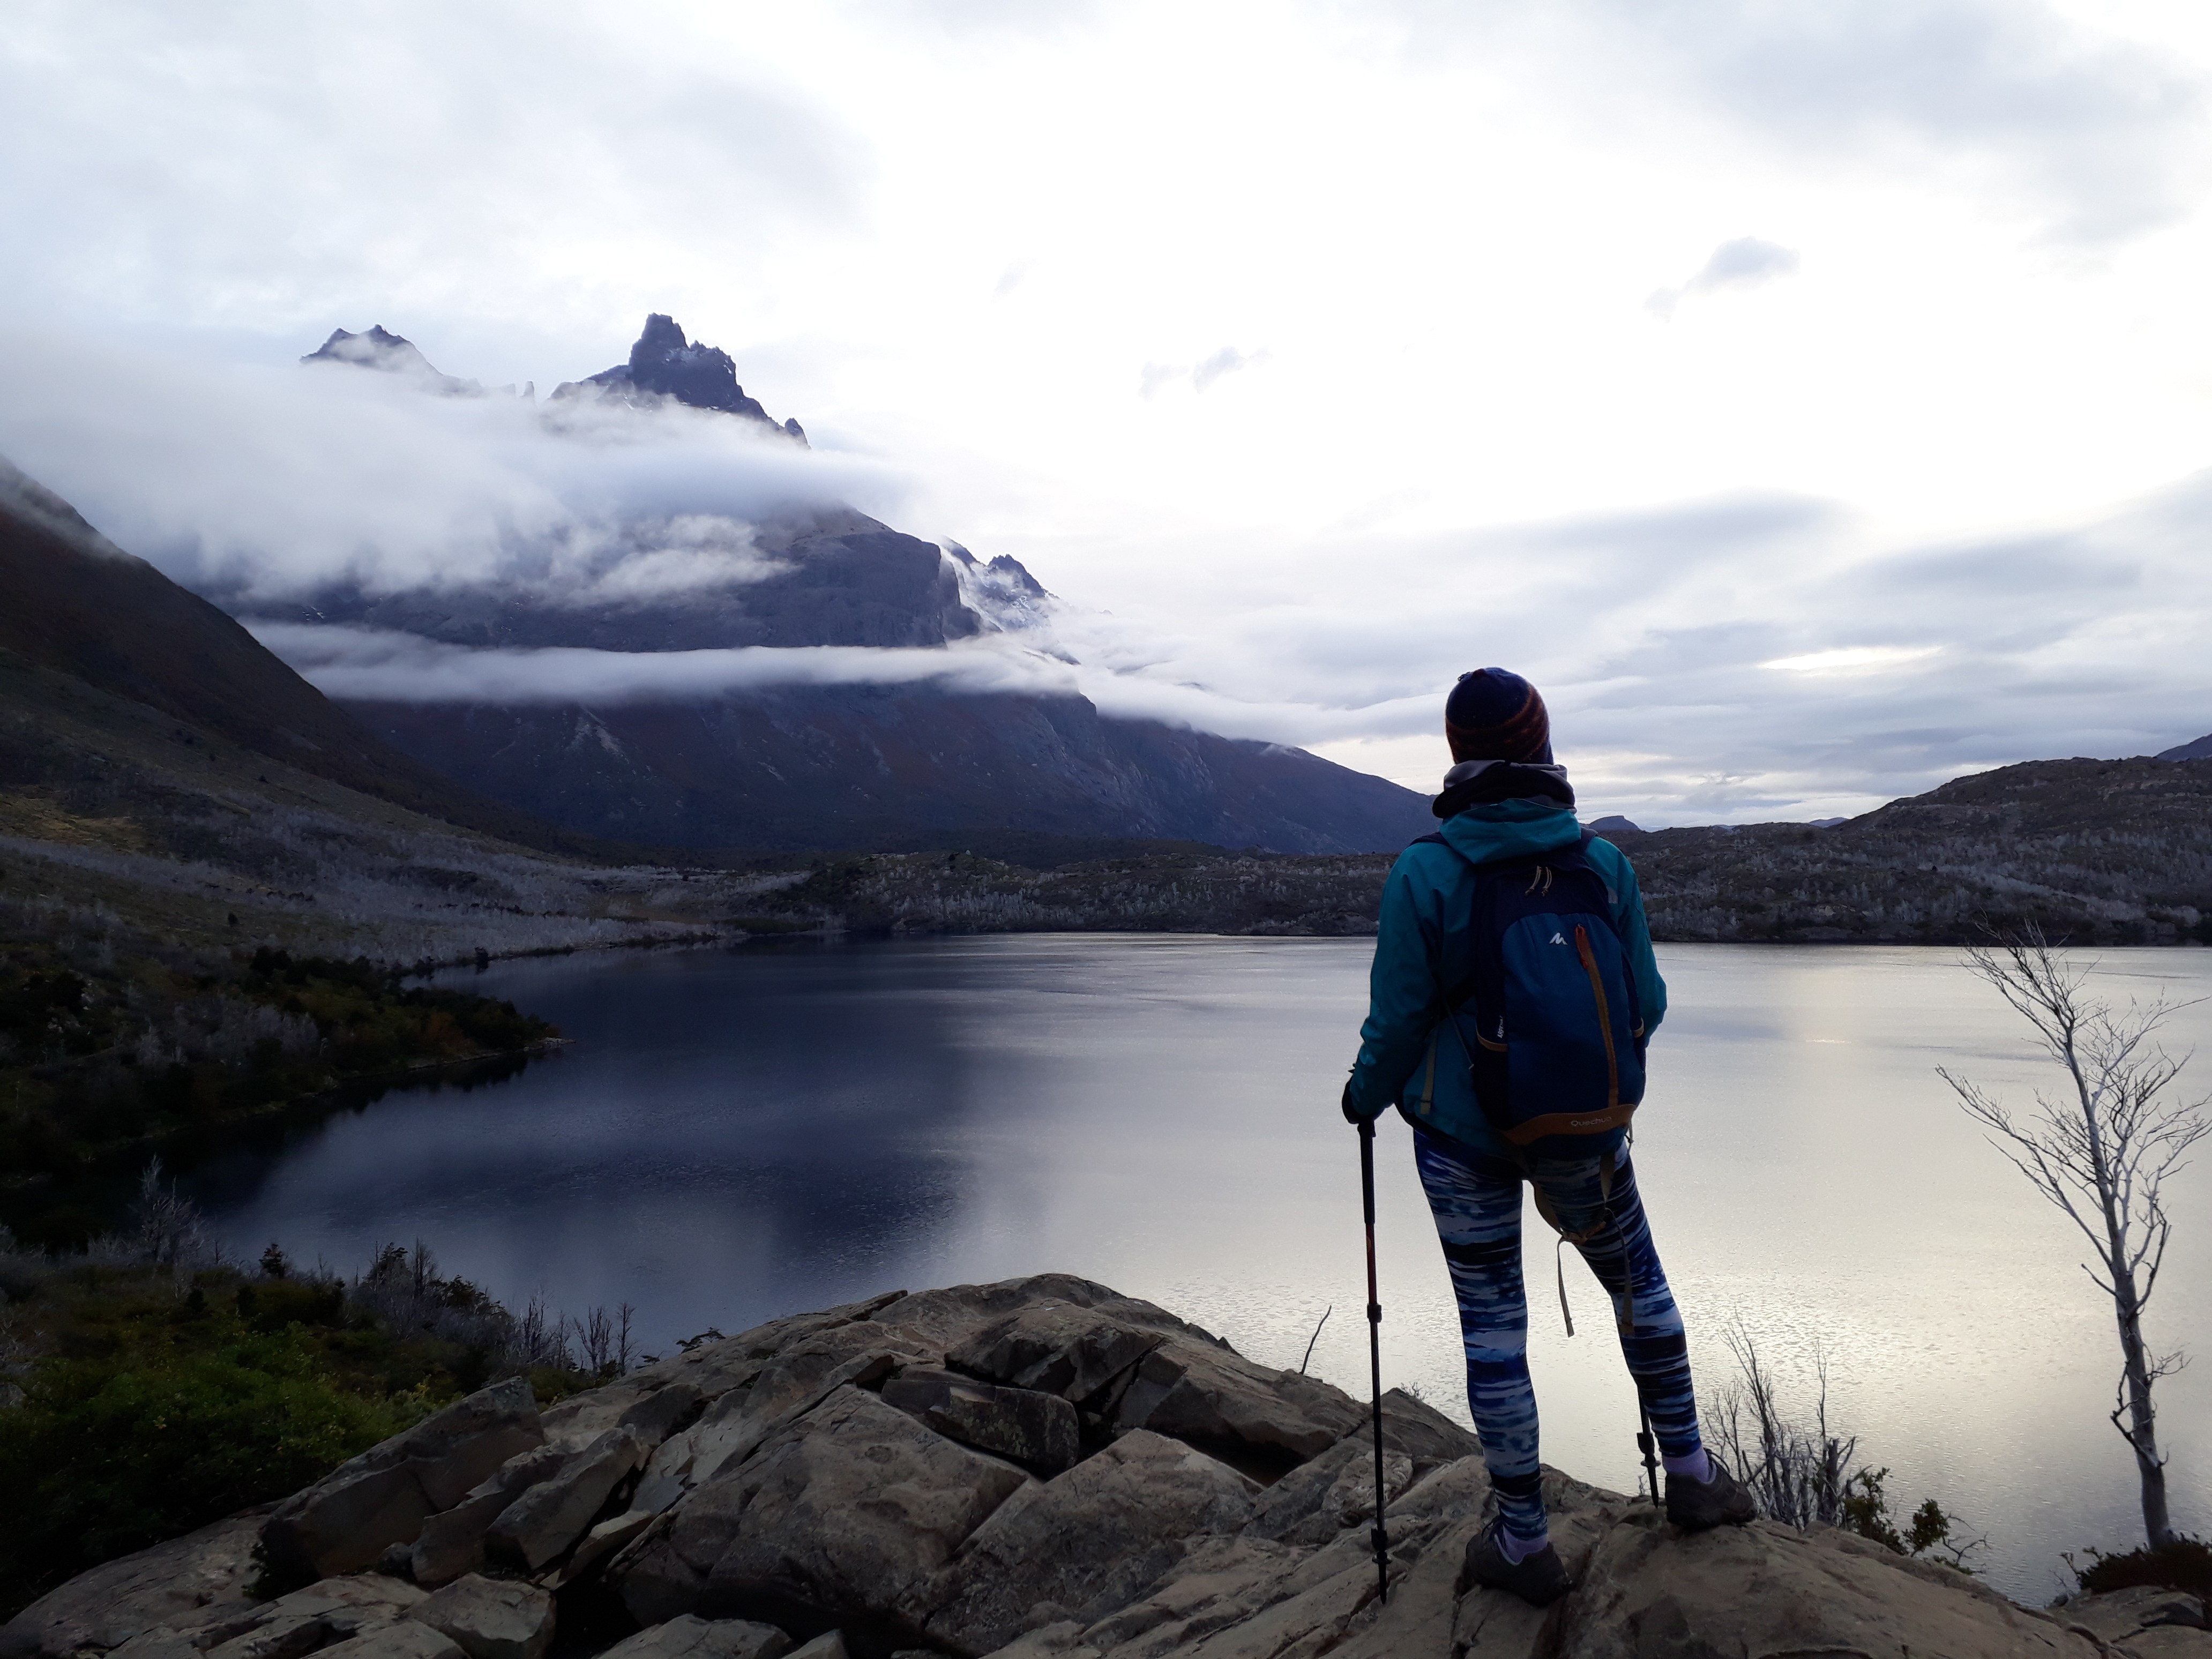
📌 Campamento Italiano to Mirador Valle del Frances
Distance: 3 km| Difficulty: moderate/hard
This part of the trail is very short, only 2km, but it took us over one hour, as the weather was particularly bad, with very heavy rain and wind. The ground was very muddy and this part of the trail is made of extremely steep and rocky uphill and downhills.
📸Highlights of this trail: In this section, we were able to admire the beautiful autumn colours of the park, streams and waterfalls and giant mountains in the background. You can also start hearing the sound of avalanches, which at the start we thought was a storm. Of course, the main highlight from this mirador is the Nordenskjold Lake behind you.
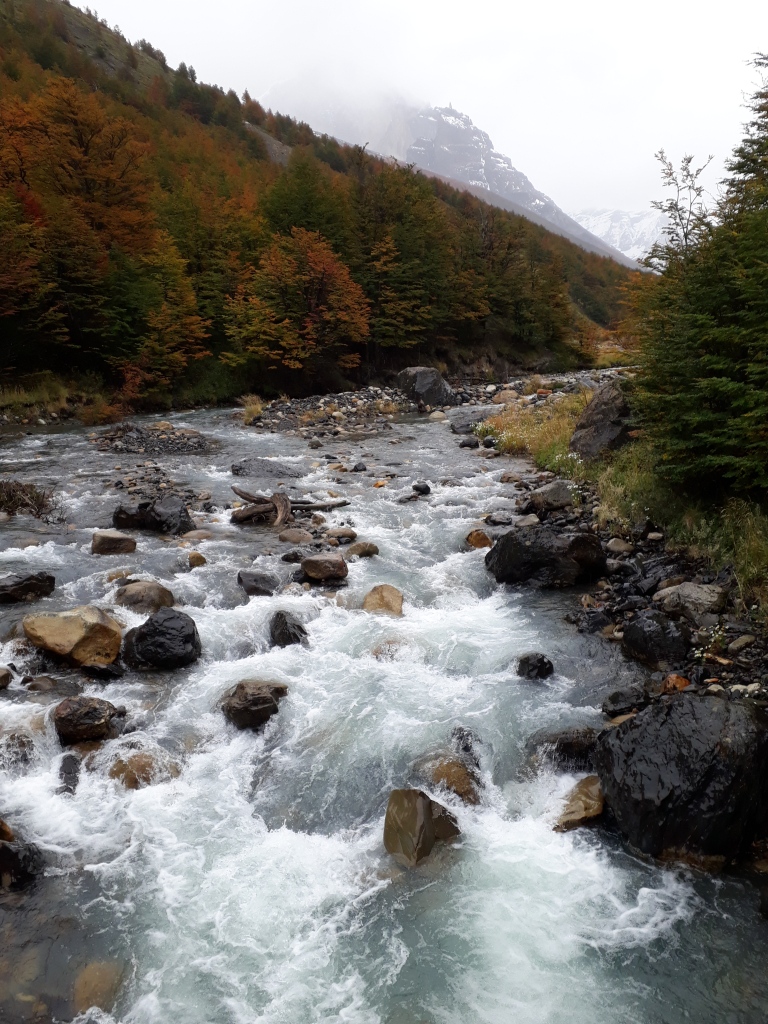
📌 Campamento Italiano to Mirador Britannico (Via Frances)
Distance: 6 km| Difficulty: hard
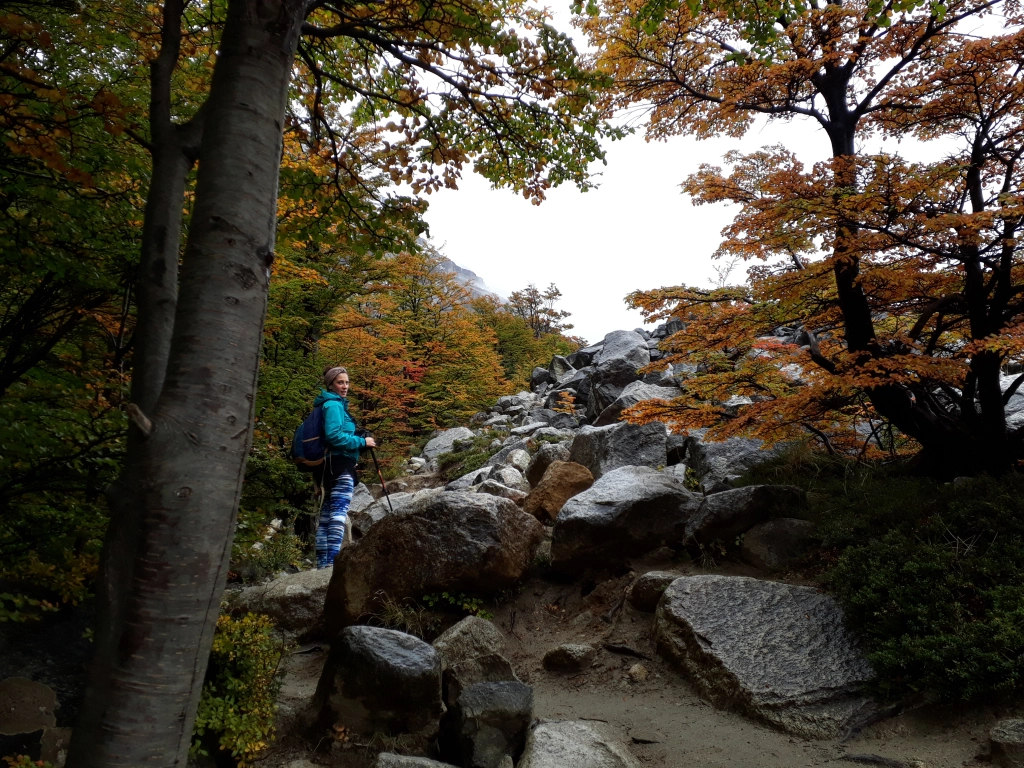
This part of the W Trek is known as the Valle del Frances Trek. Just like the previous section, this is a very beautiful section of the W Trek, but it’s also one of the hardest, as you will find extremely steep rocky sections that make it hard to hike uphill, and even harder to go downhill. There are also a few stream crossings to do. Overall, you will constantly have the impression that you went outside of the trail, as the path to follow isn’t always 100% clear.
📸Highlights of this trail: Streams, waterfalls, beautiful trees, mountains with colours that go from the red of the leaves to the intense white of the ice – this section of the W Trek has it all. The noise of the ice falling also contributes to making this part of the hike magical. We couldn’t make it all the way to the top, because we needed to be back to catch the catamaran and because of the stormy weather, but we were told that on a clear day, the view from the top is unbeatable.

📌 Campamento Italiano to Los Cuernos
Distance: 5.5 km| Difficulty: easy/moderate
This section should only take approximately 3 hours to walk. The difficulty level will depend on the weather not only of the day when you walk it but also the previous days, as this part of the trail can get very muddy and hard to walk on.
📌 Los Cuernos to Camp Central/Las Torres
Distance: 13 km| Difficulty: easy/moderate
This section is mostly flat, with the exception of some slight uphills and downhills, with a constant amazing view on Nordenskjold Lake. Just like the section before, the difficulty of this part of the trail will depend on the weather. The distance between Los Cuernos and Camp Central/Las Torres is 11km and it should take you between 4 and 5 hours to get from one point to the other.
📸Highlights of this trail: On the whole trail you can see beautiful mountains on one side and Nordenskjold Lake on the other. In the summer, you can see green trees and plants everywhere around you.
📌 Camp Central/Las Torres to Refugio Chileno
Distance: 5.5 km| Difficulty: moderate
This section is a mix of uphill and downhill to get to Chileno and it took us approximately 1.5 hours.
📸Highlights of this trail: This part of the trail is very pretty, with mountains in the background, a few streams and bridges to cross and, in the autumn, beautiful shades of colours from intense red, to orange to yellow.

📌 Refugio Chileno to Base de las Torres
Distance: 5 km| Difficulty: hard
This part was the most challenging of the whole W Trek for me and it took us about 3 hours to get there. After the first (brief) part of uphills and downhills, the second part is constantly uphills and very rocky. The Base de la Torres Trail is the most trafficked one, as it’s also the easiest to do as a day trip, so people on the path might slow you down.
📸Highlights of this trail: The colours on this trail are amazing all along the way. If you are lucky to visit Base de Las Torres on a clear day, the view is amazing.


YOU MIGHT ALSO LIKE:
Pingback: W-Trek in Torres del Paine – All you need to know – Travel Notes
Pingback: 6 Day Hikes in Torres del Paine National Park – Travel Notes
Pingback: W Trek in Torres del Paine – Our Mixed Itinerary – Travel Notes
Pingback: 6 Day Hikes in Torres del Paine National Park - Travel Notes